Stormy's Castle
So what's been happening for 9 months since my last post? I've made several butterfly frames for the shops, including some new designs, I've painted a desk and put up a gallery wall in the lounge room.
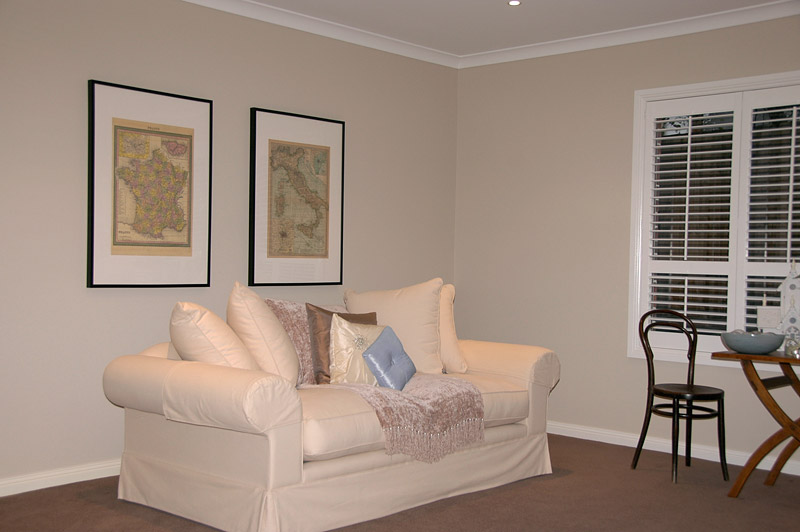
If you can remember the space prior to plantations and maps in stage one:

Stage two with the plantations and maps:
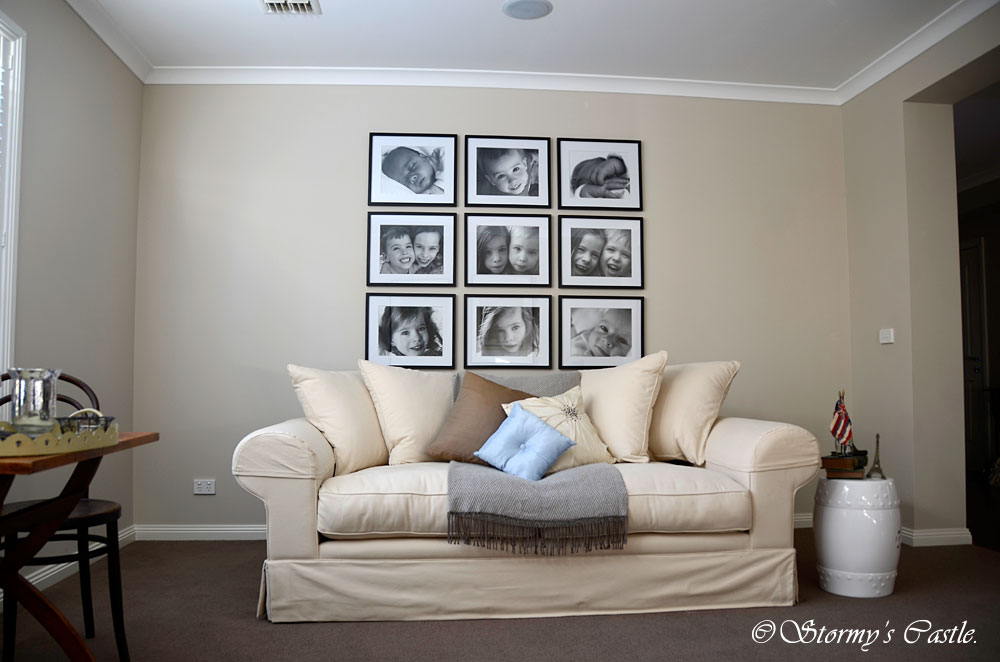
I still had a completely blank wall to fill opposite. My plan was always to have a gallery wall of black and white photos I had taken of the children. I just had to choose the right photos and find suitable frames. Easy? Not really! I had many photos to choose from, that wasn't the issue. It required careful planning, designing and searching for the right frames that were black with white matt, and in the right size for the photos....and a bit of procrastination in the 'too hard' basket. I also wanted to find a pro lab to print my photos since they were going to be enlarged on the wall. I also had to make templates the size of the frames and stick them to the wall to see if it filled the space enough.
I eventually decided on 11x14 inch enlargements. I needed 9 frames and arranged in a 3x3 format.
The frames I used I purchased from Harvey Norman, but they are readily available in other shops. They weren't the most expensive, nor the cheapest, so I hope they last a while!
I thought choosing the photos and deciding on a pro lab to process them was hard....but the most challenging part was hanging them. The back of the frames had 3 small 'D' rings which enabled the frame to be hung portrait or landscape. We initially put some frame wire between 2 of the 'D' rings, thinking we could use 1 hook on the wall, but the wire kept slipping, so the frame would hang lower (and keep getting lower...) than what we wanted.
So with all the templates made, we used them to work out where each hook would sit in the 'D' ring. Yep...2 hooks per frame. There was a lot of meticulous measuring and leveling, as I'd worked out there to be a 3.5cm gap between each of the frames. I also had to put several string lines blu-tacked to the wall to use as a straight edge...the laser level was useless...needed 6 pairs of hands for that! At least the string lines stayed in place!
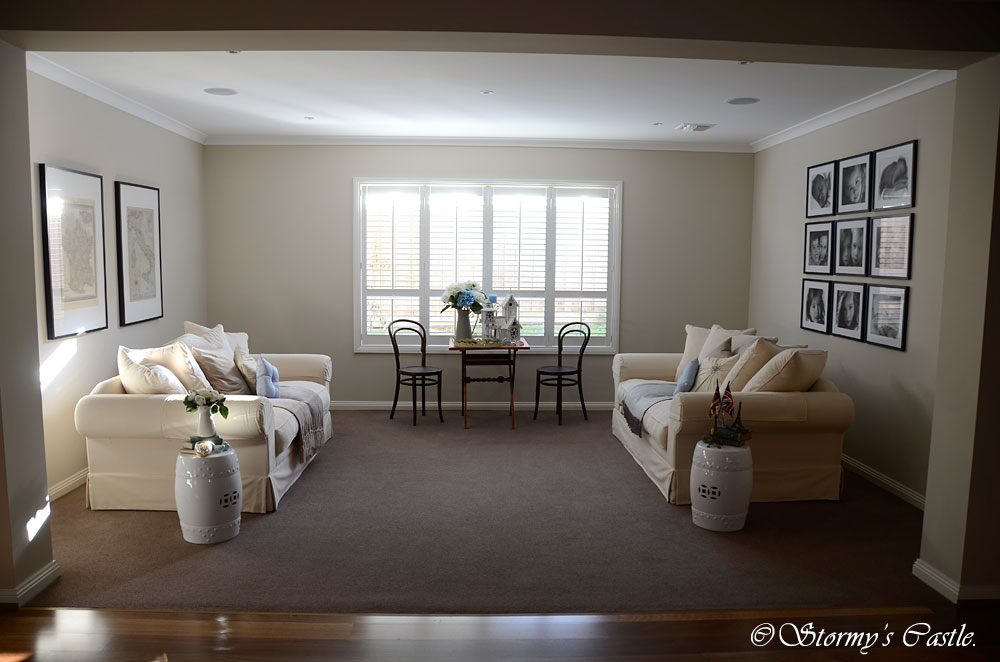
3 weekends of planning, buying frames and waiting for my online processing to be delivered, and 2 days of hanging (...and a little swearing...), stage three is now complete, and I couldn't be happier!
I thoroughly recommend RGB Digital pro lab in Brisbane for excellent quality printing and service. I ordered them one night and they were shipped the next day and delivered to me the day after that. Beautiful quality, considering some of these were scanned from a 6x4 print from film!
I'm happy, but thankful I don't have to tackle that job again!!
Stage four?? I may need (note 'need' not 'like') a rug to tie the 2 couches together, and of course, there is the tufted ottoman I will be making at some stage. I also added 2 bargain white ceramic stools from The Reject Shop ($40 each!). I'm also considering changing the downlight in the middle of the room to a chandelier at a (very) later stage.
Always a work in progress.


.jpg)


4 comments:
Wow, that looks fantastic. Well worth the effort. I love the size and scale of the frames and photos they work really well with your room.Amazingly gorgeous. X
It looks amazing!
May I know the wall color ? it look great I love it . thanks in advance
Hi Charles, the wall colour is 'Nomadic Ivory' by Bristol. Given it was painted 6 years ago, I'm not sure the colour is still available. I believe it is very similar to Taubmans Antique Ivory.
Post a Comment